Here we show a simple way to cleanly and accurately apply dental cement… without the mess.
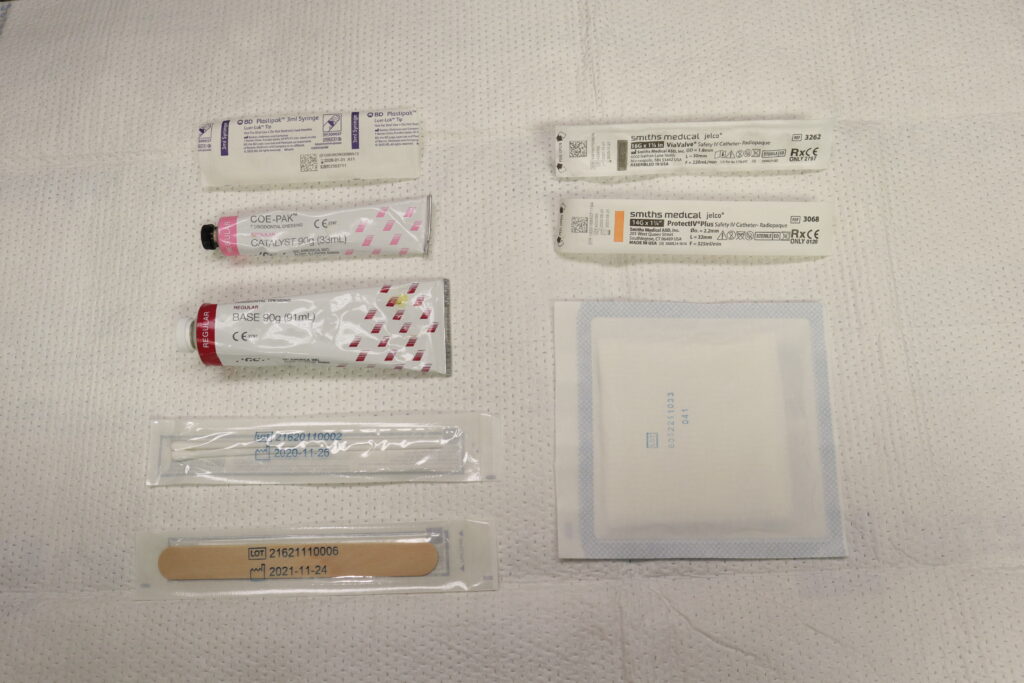
Materials
To do this technique, you will need the following:
- A 3 mL syringe
- Dental cement compound
- A stirring agent (cotton-tipped swab)
- A tongue depressor
- A 14 or 16 g angiocatheter
- A mixing surface
Steps
Remember that dental cement dries very quickly and this process is best done at bedside.
- Take out your 3 mL syringe and remove the 14 g (or 16 g if 14 g is not available) angiocath tip. Attach the angiocath tip to the luer lock on the syringe.
- Note: An additional optional but recommended step here is to trim your angiocath to ~ 1 cm
- Remove the plunger from the back of your syringe.
- Mix your cement. Use your cotton tip applicator/swab to mix equal parts of the epoxy-style cement.
- Use your tongue depressor to scoop up the cement and work it into the back of your syringe. Put in at least the amount needed for application, plus a bit more.
- Reinsert the plunger into the syringe, working it down to the luer lock tip and out the angiocath.
- Easily and cleanly apply the cement to those deep crevasses and back teeth.
Check out the POST we put together on this process on ALIEM!!
With so much to know and do in Emergency Medicine, you shouldn’t have to worry about your procedural competency… but you need to. Are you really ready to place that Blakemore or do a cric? Let SimKit help you bring your skills up to snuff in a fun and engaging way with simulation that delivers right to your door. Practice at home, at work, in the office and on your time.
Check Out More Content From Friends Of SimKit!
Subscribe to the Podcast on


Podcast subscription form
"*" indicates required fields